
|
|
IMF Tune - Bringing Back the Exchange Connection Filter
Dissecting a Keyword Report - Part 2In Verify IMF Tune with Keyword Reporting we laid the groundwork necessary to work with Keyword Reports. Today we jump straight in and start reading these reports.
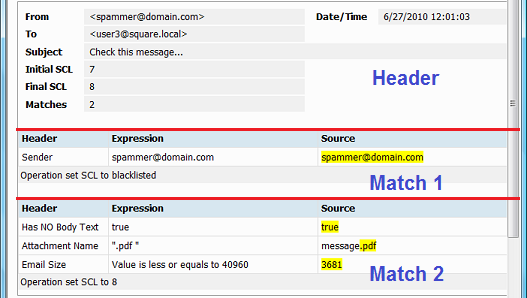
What's in the Keyword Report?Here is what a keyword report looks like for a single email.
The Standalone Keyword Report file will have many of these, one after another, each reporting on a different email. So we need to get used to distinguish between multiple reports. The report starts with a header block showing the From, To, Subject etc. This marks the starting point of each report. Following that we find one or more filter report sections. Each time an email matches some filter, a section reporting on the match is added. The header block is fairly self-explanatory. From, To, Subject and Date help us search for specific emails. You will most often want to make searches on the Subject field since spammers can easily spoof senders and hide the true recipients. At the header we also find the Initial SCL, Final SCL and number of Matches. We defined the initial and final SCLs in the first part of this article. Matches is the count of filter reports following the header section. The above example has a match count of 2, thus we have 2 filter report sections. The filter report sections describe specific filter matches. Here we have a 3 column table Header/Expression/Source followed by the type of Action the match triggered.
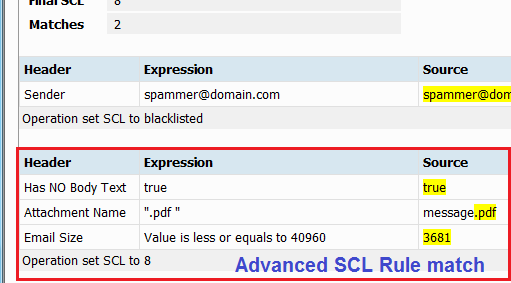
Header/Expression/SourceEach filter report section starts with a 3 column table. This information is organized in a table because of Advanced SCL Rules that can be made up of multiple conditions. Here is a match for an Advanced Rule made up of 3 conditions.
The table column information includes: Header - Identifies the filter type that flagged the match. Simple filters such as the Subject white/black lists use the email header name to identify themselves here. Other filters use more descriptive names to identify themselves more clearly. More on this in the section Naming the Filter. Note how in an Advanced Rule we have multiple filters working together to check different bits of information. Expression - The configuration relevant to the email match. Very often here we see a snippet taken from the IMF Tune configuration that shows how the filter is configured. For example if at the sender blacklist we configured *@adminstop.com, on blocking an email from bob@adminstop.com the Expression will show *@adminstop.com. Source - The actual email information that triggered the filter. Taking further the example where we are blacklisting *@adminstop.com, Source will contain the actual email sender address as extracted from the email.
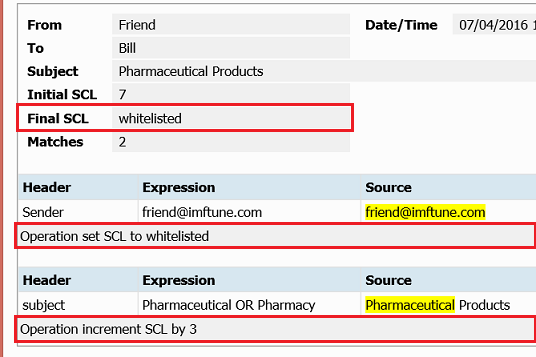
Filtering ActionEach Filter report section is concluded with an action statement. In all a filter can trigger one of three actions:
Here we need to refer back to the first part of this article series. Each filter match contributes an action. Multiple matches lead to multiple actions which when computed together lead to the final SCL. What we see at the end of each Filter match section is the action specific to the match being described. The Final SCL resulting from these actions is shown at the report header.
Naming the FilterNine years ago, when IMF Tune Keyword Reporting was first released, most IMF Tune filters operated against specific email headers such as the From, To, Subject headers etc. Hence at the time the header name itself was used to identify the IMF Tune filters. This is where the Keyword Report column name 'Header' comes from. Today we have more complex filters that don't quite fit this definition. Simple filters still make use of email header names to identify themselves. However more complex filters use other names for clarity. The following table lists how each filter identifies itself at the Keyword Report Header column
In this table we are mapping the filter name shown at the Keyword Report to the IMF Tune configuration. Let's go back to the initial example and apply this information.
The first filter match in this report shows:
Header: From this report we can immediately say that the Sender filter triggered a blacklisting operation because of the sender address spammer@domain.com. But where is the sender address configured? There are a number of places from where the Sender filter loads its configuration. Looking up the previous table we get all these locations:
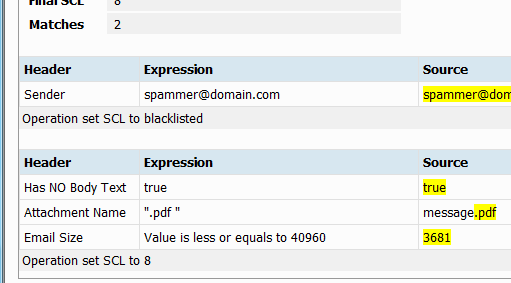
Of course we can exclude Whitelists | Accept Senders since the filter action is Blacklist. The remaining 4 locations all provide the ability to blacklist a sender address, so to pinpoint the correct location we would need to check manually. Mapping the second filter match report to the configuration is easier. The second filter report is showing 3 conditions that had to be satisfied for the email to be matched. The conditions are testing for an empty body, an attachment name and the email size. Only Advanced SCL Rules have the ability to combine multiple conditions, so the location must be:
End of Part 2Today we looked closely at the Keyword Report information. We saw how the report ties together email processing to the filter configuration. It should already be evident how this helps us in reviewing filtered emails and go back to the configuration to apply any necessary adjustments. What remains is for us to look at some examples. This is the subject of the final part of this article series.
|


